I wanted to put together this quick little tutorial after
Kitty said that she found getting the cushions pointy enough was the
bane of her life, strong words, I felt like that once too Kitty...but then I worked out a new way of making cushions, inspired by Gill's
patchwork tutorial. :D
I felt so bad about the thought of anyone else suffering with their unpointy enough cushions, I had to get this out there pronto! :D
You will need:-
- Fabric
- Needle
- Thread
- Paper (preferably graph)
- Glass beads or stuffing
- Iron/Hair straighteners
 |
| Carefully cut out a template using graph paper, keep it as square as possible, then cut a piece of fabric slightly larger. |
 |
| Turn the fabric over and place your template in the centre. |
 |
| Fold fabric (preferably along the grain) using the paper to guide you. Use your nail to press the edge down. |
 |
Press the fold, either using hair straighteners or an Iron, you will need to repeat this for each fold.
I use hair straighteners, because they're quite handy for mini ironing.
Make sure to test a scrap piece of your material, just in case it melts. |
 |
| Fold as before, but on the opposite side from the last fold, and press. |
 |
| Fold as shown, press, then fold the other side and press. Try your best to keep the sides of this particular fold, as square as possible, it helps to begin the fold at either end and move inwards towards the centre, using your fingers to press the fabric down. |
 |
| Now make another one. I usually use plain fabric for the back, to conserve the printed fabric. An old pillow case is a great source of plain fabric. |
Abracadabra.........the fabric will now change (apologies for the continuity error, we will now be demonstrating with a new fabric...)
 |
| Cut a length of fine thread, for this cushion I think I used about 35 cm. Tie a knot at one end, thread it, and insert the needle into the corner from the reverse of the fabric. |
 |
| You should sew from this point, where you can see the folds (this means you will have a less fussy edge to sew later on). Connect the two with your needle and thread as shown. |
 |
| Now that the two pieces are joined, begin sewing your cushion together. I use the ladder stitch, putting the needle under just a thread or two of the fabric. Do not sew the inner folds together, work over them. |
 |
| Ladderstitch diagram. |
 |
| When you are almost back at the beginning, you can start filling the cushion. I use micro glass beads, I can't remember which size, but I bought them from Mohair Bearmaking supplies. I hold the cushion over a jar of them, and use a teaspoon to drop them in, until it's just right. You may have to smoosh the cushion a bit to fit them in as you go. |
 |
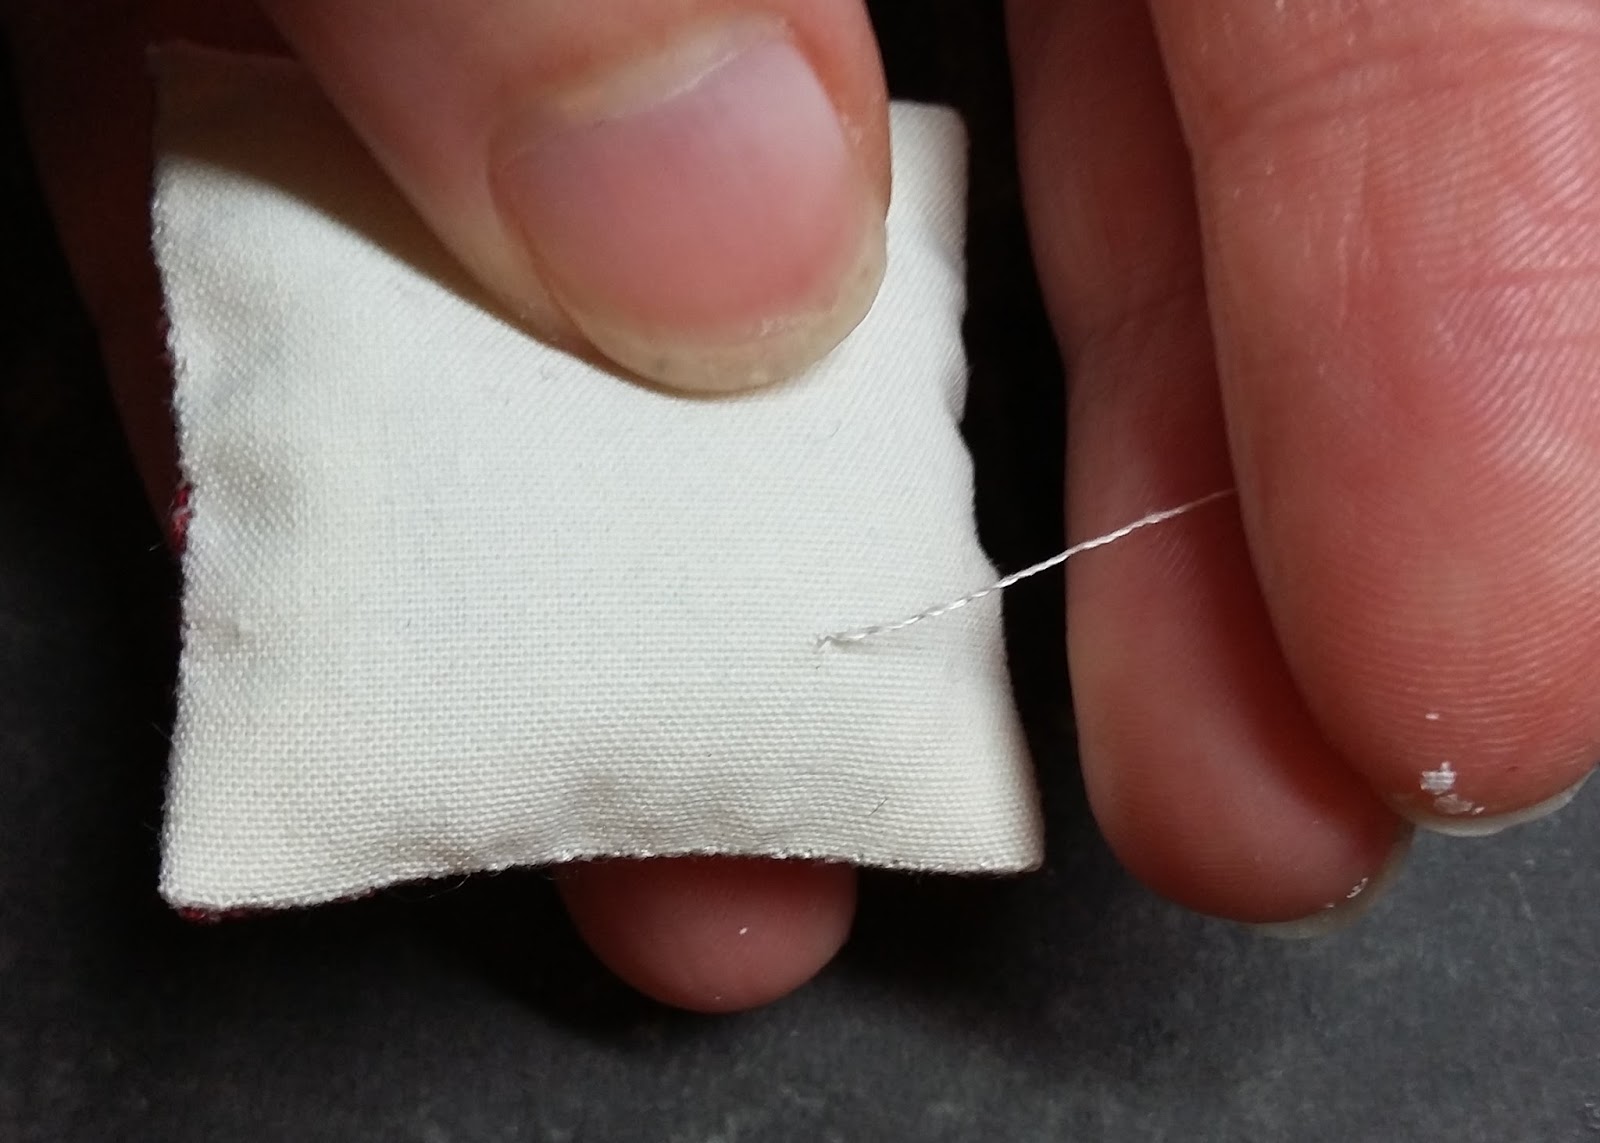
| Now carefully holding the cushion, sew up the hole, still using the ladderstitch. |
 |
| Sorry for the blur, under the last stitch at the corner put the needle under and draw through until you are left with a small loop... |
 |
| ...then put the needle through this loop and draw through to create a knot close to the corner. Repeat once or twice more. |
 |
| Then push the needle down through the corner as shown (where you just made the knot) |
 |
| Push the needle through the cushion until it pops out somewhere on the other side. |
 |
| And cut the loose thread. If there is a little short bit poking out after you have cut the thread, smoosh the cushion and it should disappear. |
The only downside about this method, is that the stitches will be slightly more visible than they would be if you used the "turning inside out" method, you can always glue a strand of thicker thread around the cushion to act as piping, which I haven't tried out yet, but I imagine it would work very nicely.
Now back to my secret project, until Christmas...
Byeeee! :)


Kisses and hugs!! Awesome. Thanks!!! Now I'm hitting upetsy and buying some fabric. What's one more project when you can have pointed corners!?!
ReplyDeleteThanks for sharing!! :)
ReplyDeleteMuchas gracias por el paso a paso!!
ReplyDeleteBesos.
Thank you for this great tutorial. I'm not good at sewing, but I will try this. Hugs from Hungary!
ReplyDeleteAn excellent tutorial and I'd never have thought of using straighteners - great tip!
ReplyDeleteПривет Сара!
ReplyDeleteЯ люблю эти подушки! Спасибо большое за прекрасный урок!
Татьяна
Ah, so that's how you do it, interesting and great! I finally got my corners pointy by using a cocktailstick to push out those corners when getting the outside out again, but this works very well too and the whole cushion looks a lot nicer than I can get my cushions the inside out way :D. Thank you so much for taking the time to show us this method Sarah, much appreciated!
ReplyDeleteThis tutorial was FAB! Sarah!!! I had never heard of this method before and I am eager to give it a try as I find that my corners are not always as pointy as I would like. But here is something else which I am also going to try, is the using a flat iron for hair as a means of pressing fabric, what a time saver to be sure and it's one of those ideas in which you slap your forehead and exclaim, "But of course,.... Why didn't I think of THAT!!!" :D
ReplyDeleteelizabeth
Brilliant!!! This is a great tutorial! Gosh, now I better go make some cushions! I can't wait to see your project!
ReplyDeleteFabulous tutorial, Sarah, thanks for sharing :D!
ReplyDeleteJust like you, I've also seen this technique on Gill's blog, I love her quilting miniature work!
But using a hair straightener was something I haven't thought of, great tip, thanks for sharing too :D!
Thanks for your visits :)!
Hugs, Ilona
Thank you for this very useful tutorial!
ReplyDeleteGeneviève
Thanks for sharing, I was thinking of giving up and buying cushions, but I might give it another try later using this tutorial =)
ReplyDeleteHannah
Beautiful works
ReplyDeleteBeautiful works
ReplyDeleteThank you for a great and fun tutorial with included magic! Finally my cushions will have pointy corners :) /Kitty
ReplyDeleteusing a hair straightener was something I haven't thought of, great tip, thanks for sharing too :D!
ReplyDeleteหนังซอมบี้
I liked this blog and the white bedspread you could easily custimize your bedroom. Thanks for posting it.
ReplyDelete100% Cotton Bedlinen
wow !!! beautiful and so lovely work :) i really like your good idea so much.Thank for sharing.
ReplyDeleteดูหนัง
Thanks for sharing. good handy crafts. Great post though.
ReplyDeleteThis is going to sound like such a newbie question, but ... where does one buy miniature fabrics??? i'm pretty proficient with Google and yet i'm getting nowhere. PLease help, Amber! And thank you for the sweet tutorials, and for sharing all you do. xo
ReplyDelete