 |
| The template in this tutorial is for the suitcase size and shape on the right (the one emblazoned with travel stickers, which I didn't include in the printable, due to the nicking from the internet nature of them, sorry...) |
I have divided this tutorial into 3 parts, so that anybody visiting my blog, does not suffer a browser crash caused by picture and word overload :D
The main part of the suitcase, is in this part which is Part 1, Parts 2 and 3 are embellishments, such as handles and straps, etc.
For the suitcase in my last post and those ones to the left in the photo above, I used a template available online by
Kirsten of Min-hobbyblogg, which I had to modify, which would have made a tutorial including a "How to modify this template" a bit confusing, however you could still use this template, if you put card sides up to the height of the suitcase, into the interior sides.
For this tutorial, I have made a new template, based on a real suitcase, scaled down. Links below.
Free Suitcase body PDF
(Print onto 220gsm card)
I threw quite a few shoe box templates in there, so as to waste/not waste your card :D
Free Suitcase "leather" and lining PDF link
(Print onto graph paper, on my printer the graph should be facing up, in order to get the printer to print on the blank side, I assume all printers work like mine..)
Use a few light coats of hairspray on the "leather" and lining print out, to seal the ink.
By the way, if you don't have MsWord, there is a very similar free programme called, LibreOffice, available to download freely online (with a small donation request if you want to donate, but this is optional. I am not affiliated with LibreOffice :D). Mine is a little jumpy, but it does the job. Could be a problem at my end, who knows, who cares :D I used it to make the box templates, resizing, etc.
You will need :-
- A4 220gsm card
- A4 graph paper (preferably with graph only on one side of each sheet)
- A4 100gsm cartridge/laid paper (or fabric which is more durable for bendy parts, I used cotton lawn)
- Ruler
- Sharp pencil ( keep it quite sharp, throughout)
- Craft knife
- Printer
- Hairspray ( I used Silvikrin classic, firm hold no.5, but any should do :D )
- Clear, water based paper glue (mine is ancient, and is UHU all purpose adhesive without solvent, this glue is for attaching the "leather" and lining to the card.)
- PVA glue (for gluing fabric onto "leather", straps onto suitcase, etc)
- Superglue (for buckle tabs, etc.)
- Flat shader paintbrush (use with PVA glue and water based glue)
- Cocktail stick
- Tweezers
- Ball stylus (or thick blunt needle)
- Tapestry needle ( or thick blunt needle)
- Water colour paint (or watered down acrylic), Brown and Black
- Wire (think mine is 0.4mm)
- Fine long nosed pliers (you might get away with pointy tweezers)
- Snips (or scissors, if you don't mind possible blunting)
- Needle
- Circle Template
- No hole beads, Pin heads, Miniature nail heads...
- Beeswax polish
Boring scoring basics
 |
| When you are cutting out the templates, try to cut each parallel tab at the same time, so that everything is straight, because I am right handed, I cut the right side clean through first. I lightly score the left side, with the ruler still held in position from the first cut, and then later use the score to cut cleanly through, using the ruler as a guard. Hard to explain what I mean here, but basically, you want to keep the line as straight as possible, so that the box parallel sides, when made up, will be quite square. |
 |
| When using the ball stylus to create crease lines, try to make the crease, slightly above the side edge. This is so that when the two sections are folded up vertically, the sides of those sides will be butting up against each other very neatly. |
Suitcase body
 |
| Cut out both the base and lid template, score and crease. Bend the tabs inwards on the same side you scored. Make up the base and lid. After putting glue on the tab, use tweezers to hold the tab and the side together, keeping it as square as possible. |
 |
| Then use the other end of your tweezers (or something similar to this), to press down the tab firmly, the whole way along. Do this for all tabs, on the base and the lid. |
BEFORE YOU GO ANY FURTHER, HOLD YOUR BOXES WITH TWEEZERS AND GIVE THEM A FEW LIGHT COATS OF...HAIRSPRAY. Leave to dry naturally.
I noticed when I used the glue on the boxes, it warped them, quite badly actually, so I started again, and used some hairspray on them, and it presumably stops the card from absorbing too much glue whilst the glue dries...or something, well it works. The hairspray, may warp the box slightly, if the coats are heavy, so when it dries, you can twist and reshape them, to get them square again.
 |
| Set the box on the reverse of the printed "leather", about the height of the box and a bit down from the top of the sheet and draw around it, with a sharp pencil. |
 |
| Use a pencil and ruler to straighten the traced box outline, going beyond the boundaries of the base of the box (to include the sides). Then use the box, as shown, to measure the "height" of the box. |
 |
| You should be able to fit both the bottom and top of the box, on the "leather". Add tabs as shown, so you don't accidentally cut them off, they don't need to be neat, and also a few mm excess at the top of each "side". |
 |
| Your cutouts should look like this. Do not crease the lines. DON'T DO IT! I know, it is tempting, I did it the first time, but the results are better if you don't. |
 |
| Apply paper glue, using the flat shader paintbrush, to the base of the box, and set onto the graph paper side, and use your finger tips (cotton buds, eraser, anything) to press down firmly, including the corners. |
 |
| Apply the glue to the side of the box as shown, making sure to work it into the gap where the box meets the graph paper. |
 |
| Set the box down at an angle, as shown, drag back slightly and roll forward, the glued side down onto the graph paper side. This helps make sure the paper side attaches smoothly, from the base to the top. |
 |
| Now that you have the side attached, use a pair of nail scissors to cut off the excess tab, as the dotted red line indicates. |
 |
| Glue the side tabs that were just trimmed, to the side of the box. Bend the top tab over, as shown, run your finger along to crease it, lift it and apply glue to the graph paper side, working the glue along the edge of the box too, then fold over, as shown, run your finger along it, then push the rest of the tab over so that it attaches to the inside of the box. You can set the box on its side and use the end of your tweezers to press down on it, to make sure it is really secure. Repeat for the other "tabbed end". |
 |
| Hope this doesn't confuse, as this is a picture of the lid, instead of the base... The tabbed sides have now been glued into place. Now glue the untabbed sides, in the same manner as the tabbed sides. Before folding the edge over, cut off any excess at the sides as shown (red dotted line). Then, as for the tabbed sides, fold over, crease, glue. etc. |
 |
Carefully cut out the two lining templates, place them on the reverse side of the lining paper, using the graph as a guide, then use a sharp pencil to trace around them. Then use a sharp pencil and ruler to make sure everything is square. (They will be slightly bigger than the template, but that isn't a problem, so long as you used a sharp pencil :D)
|
 |
| Turn both pieces over so the lining is facing you, and use a stylus and ruler, to create a crease line, as the red lines indicate. Then fold inwards. |
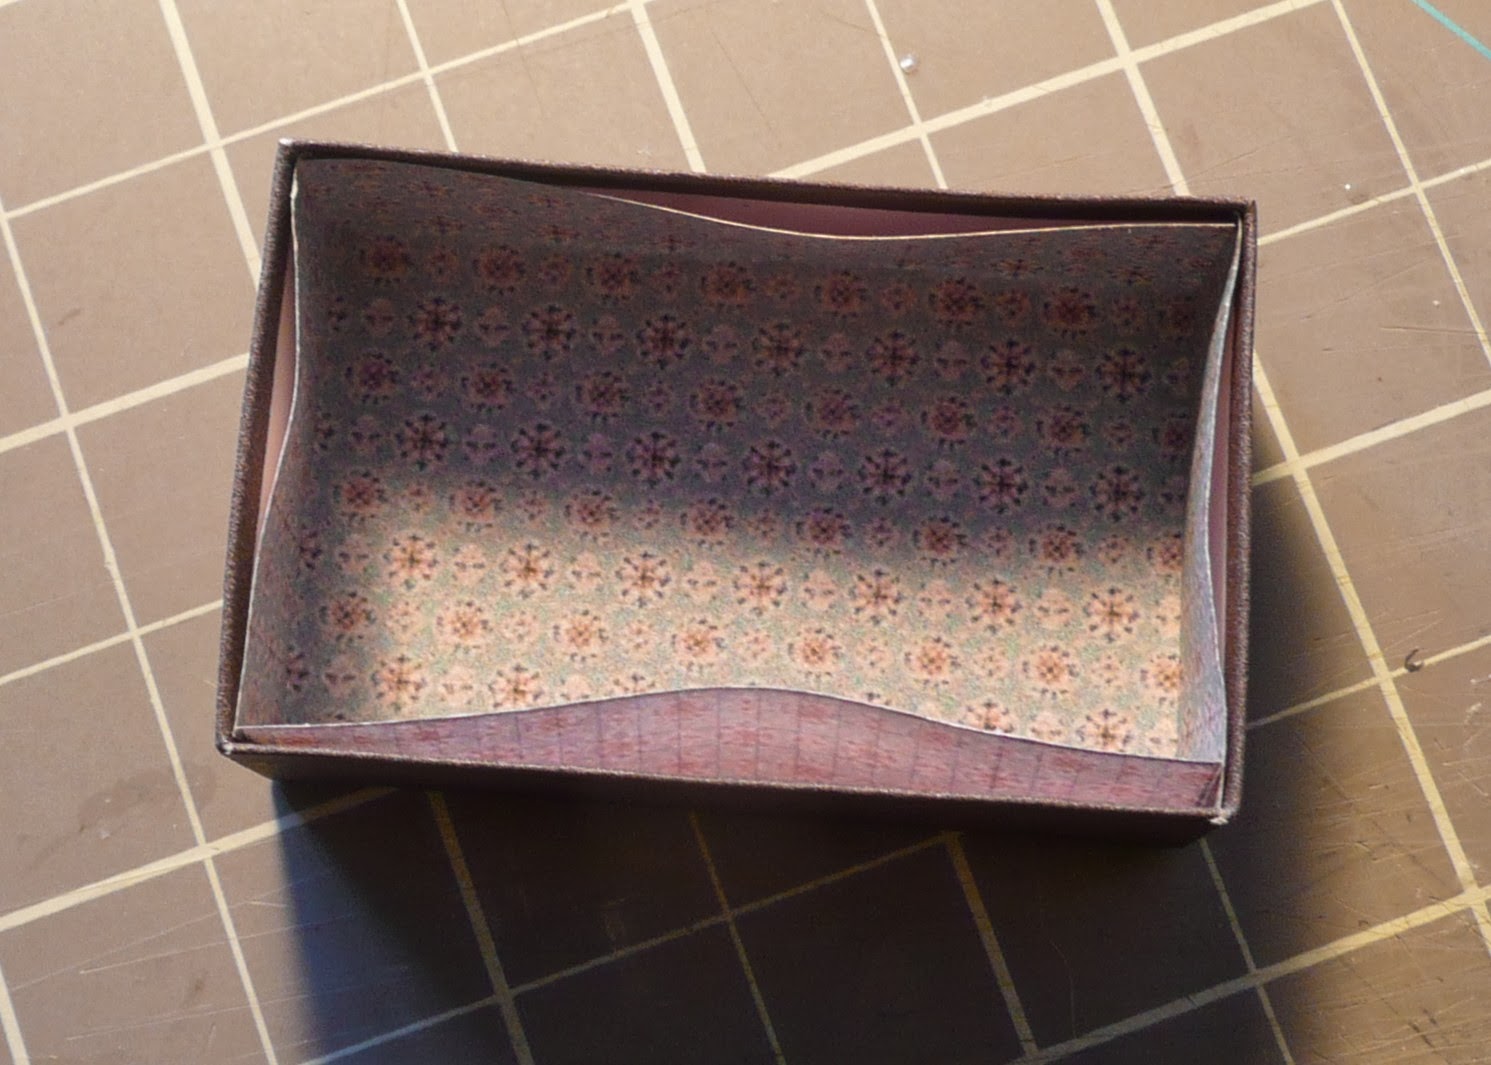 |
| Dry fit the lining. This is perfect, I know it doesn't look it, but those sides flatten out perfectly in the end, so long as the base fits. |
 |
| Apply glue, only to the base of the interior, fold over the tabs before putting the lining in, and then press down firmly, making sure the corners, etc, are all in contact with the glued base. Apply glue onto one of the inside sides of the box, then lift the lining flap up, put the box on its side, and use the end of tweezers to press it down securely. Don't rub it to smooth it, as this might damage the paper. Glue one side at a time, keeping the others folded down, out of the way. |
 |
| You might want to leave your box and lid for awhile, until the glue dries, as you might damage the lining on the lid, or worse, the lid might stick to the box. Then use the side of the stylus, and run it along the edges, to dent and round it. Putting the lid on the box, helps to keep it sturdy, whilst doing this. Surprising how sturdy it is actually. |
 |
| Use the end of your tweezers, to dent the corners too. |
 |
| This is how to make the hinge. Using the lid lining template as a guide, put the longest side of the tab, against the reverse of "leather", and mark out the width as shown. You will then need to mark out the rough height of the box with a little excess and cut it out. If you want to make the hinge longer lasting, glue the "leather" reverse (graph side) onto fabric, such as cotton lawn, and then cut it out, again.. |
 |
| Apply glue along one side of the inside of the lid, then stick the "leather" rectangle in, as shown. Cut out a piece of the lining, the same width and height of the inside of the lid (marked X) and glue into place. |
 |
| The lining strip glued into place, over the X bit. Hmm, interesting :D |
 |
| On the reverse of the hinge, apply a fine line of PVA glue. You can use your finger to run along the glued area, to remove any excess, and to smooth it into the gap. Leave to dry. |
 |
| Once the hinge is dry, bend the hinge back and crease it. No fabric used here, but it is worth it. I made another suitcase or two, and it makes the bending parts of the suitcase more durable. I sometimes sit quietly somewhere, in a stupor and open and close my tiny suitcase, over and over........such excitement in my life :D |
 |
| Put the lid on the box. Make sure it is on properly. Bend the hinge back, and apply glue to the reverse, as shown. |
 |
Before attaching the glued side of the hinge to the box, use a ball stylus along the edge where it joins the lid, run it from arrow to arrow. Then use your finger to smooth the hinge down towards all the edges. Cut off any excess if necessary, and smooth the edges, onto the box.
Leave to one side, to dry thoroughly and naturally. DO NOT ATTEMPT TO OPEN THE LID, STAY AWAY FROM IT! :D Because the hinge will be damp, you could damage it, plus, it is important that the edge closest to the lid, stays stuck to the box. Oh and don't stick it on the radiator, the radiator warps it, BADLY. Suitcase, say hello to bin.
You are now ready for Part 2 or.... |
I hate this template
If this template is not suitable for your requirements, or you are working in a different scale and using thicker card etc., here is a rough idea of how to work out your dimensions.
In order to get a good fit, your lid must be bigger than the base. If you are going to cover your box with paper, you will need to make an allowance for that too.
 |
I have added this diagram to illustrate where I got the following base card and lining paper folding nonsense from :D
The left and right side of the suitcase box, show how many layers of paper and card there will be to consider, between the space of the plain card lid, and plain card box, obviously, the same applies for the front and back too, which is exactly the same as the sides,....this is confusing, hopefully, it will become clearer soon. |
 |
| Get a scrap piece of your base card, fold in two, that is either side of your base box, and a scrap piece of your graph paper, fold to make six edges, that is two layers of leather paper on the sides of the base, two layers of leather on the inside of the lid and two layers of lining paper...refer to diagram above :D |
 |
| Hold the folded edges (8 in total) and measure the thickness, mine came to roughly 1.5mm, always round up, if it is just over a mm, make it 1.5mm, etc. |
 |
So for example, the base area here is 5 x 3.2 cm (50 x 32 mm), I need to now make the lid top area, 1.5 mm wider and higher than the base, to accomodate those paper layers. So by adding the 1.5 mm, to the the base measurements the lid measurements will be, 5.15 x 3.35 cm ( 51.5 x 33.5 mm ). The side heights and lid heights are, of course, irrelevant, as they have nothing to do with the lid fitting onto the box, the only thing that matters is the rectangle measurements in the centre of the template.
To get your lining to fit nicely, subtract about 1mm (that is, if two edges of your lining paper, do not go over 1mm thick) from the base and lid measurements.
However, if you are going to print a template, to trace around, subtract about 1.5mm, the extra 0.5mm is to allow for the pencil marks, which will make the traced template, slightly bigger.
You will also need to subtract about 1mm from the height of the sides to be lined, so that you get that nice leather rim around the inside.
Click here for a hi-res scan of leather if you need it.
Hope that makes sense. Took me awhile to get my head around trying to explain that :D |


Hello Sarah,
ReplyDeleteI just ready your last 3 posts. Thank you for the great instructions. the luggage is just beautiful. Very well done and very realistic.
Big hug,
Giac
Many Thanks Giac :) I'm still here, checking it... :D
DeleteThank you so much for sharing this, they are lovely!
ReplyDeleteThanks Daphne :)
DeleteThank you so much for this very detailed and precise tutorial !
ReplyDeleteThe suitcase is gorgeous !
Thanks Marie-Laure :)
DeleteThey turned out really well! Hopefully I will get the nerve to try these, lol.
ReplyDeleteYes definitely try them. If you need any help with the template, give me a shout. I thought they would work well for Barbie's scale too, might need thicker card though.
DeleteThanks for this beautiful tutorial.
ReplyDeleteBye, Faby
Thank you for a wonderful tutorial. The suitcases look very realistic. You are very talented indeed!
ReplyDeleteThis luggage is great and we a tutorial too! Some of the best luggage I have seen!
ReplyDeleteUn tutorial muy interesante. Gracias
ReplyDeleteUn conjunto de viaje precioso, gracias por tu tutorial:-)
ReplyDeleteMerci Sarah pour ce tutoriel très bien expliqué ! Les valises sont très bien faites.
ReplyDeleteC'est un bel ensemble de bagages !
Amicalement. rosethé
This is a brilliant tutorial! The suitcases (and shoe boxes) look excellent. As always, thank you for sharing your mad skills with the rest of us =0)
ReplyDeleteHi Sarah! This is such terrific looking luggage! The details that you have incorporated both inside and out are so realistic and clean, by which I mean that there are no glue splotches or messy edges anywhere, and the suitcases look like they could be easily packed and ready to go at a moments notice. You have made them look- Usable! Beautiful craftsmanship Sarah! :D
ReplyDeleteelizabeth
Thank you for sharing =) Now I have to try this =) You know I said I tried before and failed.. With this great tutorial I cant fail ( I hope =) )
ReplyDeleteBut it might take awhile until I dare to try =)
Hannah
Bellissimo tutorial e molto ben spiegato!
ReplyDeleteUn caro saluto.Manu
Hi Sarah...found your blog through Studio E. Love your luggage tutorial. I have tried another luggage using matchboxes. Love to make them.. Will try you template.
ReplyDeleteI have added you to my website as a Blog I follow.
Have a great day.
fatima
Greetings From Turkey! Thank you very much for your great tutorials.I would like tell you " ellerine sağlık " a proverb in Turkish means " wish health to your hands ". See you again...
ReplyDeleteFabulous tutorial, thank you xx
ReplyDeleteamazing! downloaded the pdfs and looking forward to creating many of these. you're very kind to share all this info with us. THANK YOU!
ReplyDeleteThe Guard told Rahul to come back after two days, when train will return back from Patna, and unload the bike. After 3 hours train reached Satna, Folding Boxes
ReplyDeleteThank You and that i have a super provide: Where To Loan For House Renovation remodel garage into living space
ReplyDelete