Translate

Showing posts with label 1:12. Show all posts

Monday, 12 October 2015

1:12 scale cushion tutorial (for pointy corners!)

I wanted to put together this quick little tutorial after Kitty said that she found getting the cushions pointy enough was the bane of her life, strong words, I felt like that once too Kitty...but then I worked out a new way of making cushions, inspired by Gill's patchwork tutorial. :D

I felt so bad about the thought of anyone else suffering with their unpointy enough cushions, I had to get this out there pronto! :D


You will need:-

  • Fabric
  • Needle
  • Thread
  • Paper (preferably graph)
  • Glass beads or stuffing
  • Iron/Hair straighteners


Carefully cut out a template using graph paper, keep it as square as possible, then cut a piece of fabric slightly larger.


Turn the fabric over and place your template in the centre.


Fold fabric (preferably along the grain) using the paper to guide you. Use your nail to press the edge down.


Press the fold, either using hair straighteners or an Iron, you will need to repeat this for each fold.
I use hair straighteners, because they're quite handy for mini ironing.

Make sure to test a scrap piece of your material, just in case it melts. 


Fold as before, but on the opposite side from the last fold, and press. 

Fold as shown, press, then fold the other side and press. Try your best to keep the sides of this particular fold, as square as possible, it helps to begin the fold at either end and move inwards towards the centre, using your fingers to press the fabric down.


Now make another one. I usually use plain fabric for the back, to conserve the printed fabric. An old pillow case is a great source of plain fabric.

Abracadabra.........the fabric will now change (apologies for the continuity error, we will now be demonstrating with a new fabric...)


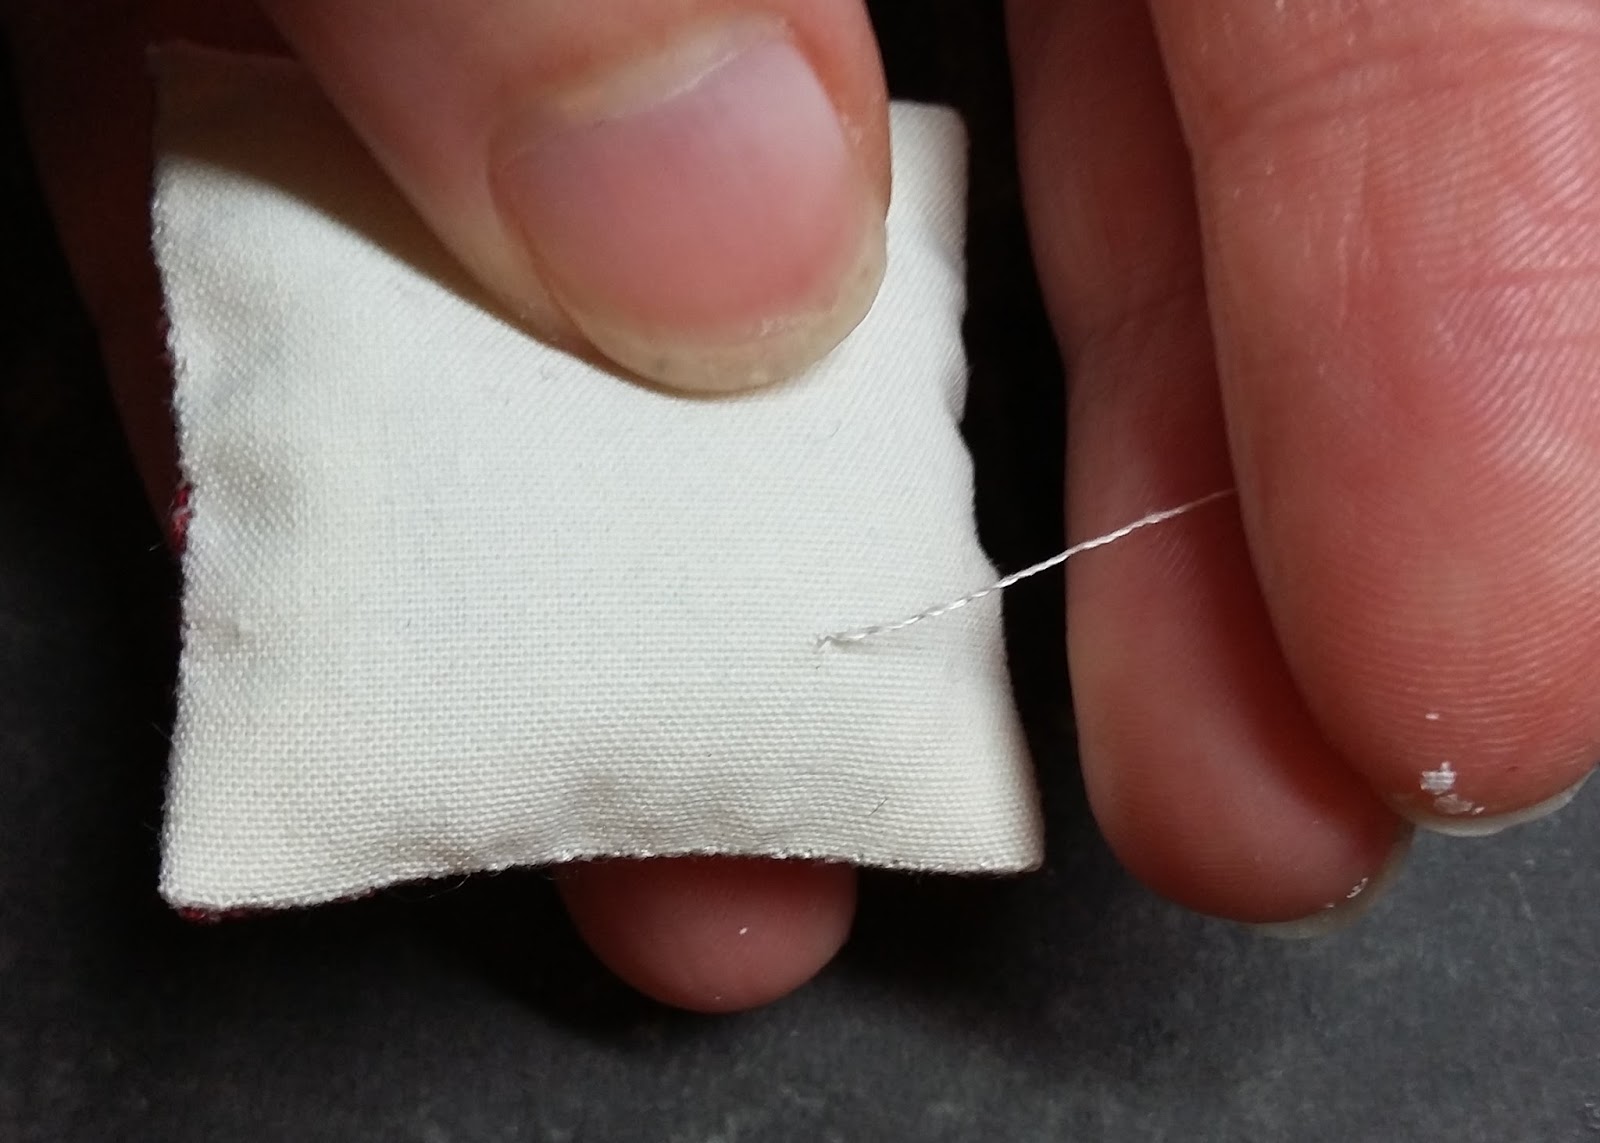
Cut a length of fine thread, for this cushion I think I used about 35 cm. Tie a knot at one end, thread it, and insert the needle into the corner from the reverse of the fabric. 


You should sew from this point, where you can see the folds (this means you will have a less fussy edge to sew later on). Connect the two with your needle and thread as shown.


Now that the two pieces are joined, begin sewing your cushion together. I use the ladder stitch, putting the needle under just a thread or two of the fabric. Do not sew the inner folds together, work over them. 


Ladderstitch diagram.


When you are almost back at the beginning, you can start filling the cushion. I use micro glass beads, I can't remember which size, but I bought them from Mohair Bearmaking supplies. I  hold the cushion over a jar of them, and use a teaspoon to drop them in, until it's just right. You may have to smoosh the cushion a bit to fit them in as you go.


Now carefully holding the cushion, sew up the hole, still using the ladderstitch. 


Sorry for the blur, under the last stitch at the corner put the needle under and draw through until you are left with a small loop...


...then put the needle through this loop and draw through to create a knot close to the corner. Repeat once or twice more. 


Then push the needle down through the corner as shown (where you just made the knot)


Push the needle through the cushion until it pops out somewhere on the other side.


And cut the loose thread. If there is a little short bit poking out after you have cut the thread, smoosh the cushion and it should disappear.
The only downside about this method, is that the stitches will be slightly more visible than they would be if you used the "turning inside out" method, you can always glue a strand of thicker thread around the cushion to act as piping, which I haven't tried out yet, but I imagine it would work very nicely. 

Now back to my secret project, until Christmas...

Byeeee! :)

Friday, 24 April 2015

1:12 scale Wire basket tutorial

Ray Storey Glass bottle, Mini Mundus washstand kit and Daffodils kit by Bonnie Lavish


Before starting, you will need straight wire. You can use a dremel tool and vice to straighten wire.  You will need to run some wire wool down the unstraightened wire first, put one end of the wire into the drill and the other in the vice, then pull the wire taught, wait for the twang to end then briefly switch the dremel tool on. Run your finger and thumb down the wire to make sure it isn't kinked, and wear goggles whilst the tool is switched on...or like me, close your eyes and hope for the best!  There are other ways to straighten wire, but this is the way that works for me.


You will need:-

  • Wire (suitable for soldering)
  • Solder and flux
  • Soldering iron (preferably one with flame)
  • Wire snips
  • Wooden block or similar (something that you don't mind getting burnt..)
  • Wire wool
  • Graph paper
  • Masking tape
  • Stainless steel tray


To work out the length of the wire pieces needed, place them against your block as shown, the parts touching the wooden block will be the base of the basket, and the overhang will be the sides.


To work out the number of wires needed for each side, place the block onto a piece of graph paper. I've chosen to use each 1mm square as the spacing guide. The blue lines indicate the other wires needed, that aren't shown. Make sure to leave a small space at either side, as indicated by the red arrows.

You will need to do this again, with the other side of your block (if you're using a block with equal sides, then just double the number you got originally)

Once you have all of your wires cut to length, carefully wash them in soapy water and leave to dry, and only handle with tweezers afterwards.


Let's try and explain this... You have to stick down strips of masking tape on to the back of a stainless steel tray, with the STICKY SIDE UP!.  The horizontal strips have to be parallel with a gap slightly less than the height of one of the wires...and the same for the vertical strips, with the other length of wire... The following pictures will probably help to make sense of this..moving on..


By the way, you have to do all of the above so that you can slip this little bit of graph paper under ;)


Use tweezers to place the wires as shown, using the graph paper as a guide to keep everything straight and evenly spaced.  


Then lay the other wires on top as shown...


Use a paintbrush to apply flux under the wires, being careful not to dislodge or bend them.


You will need two strips of masking tape to hold down the top wires, at either end.  This helps to make sure the top (horizontal) wires are all in contact with the bottom (vertical) wires. Be careful not to tack them down too tightly though, it's mostly to make sure they don't move about when applying the solder.


Use a craft knife to slice off little bits of solder. You can try using them at that size, or you can be mad like me, and cut each slice in two, as the red line indicates.


Welcome to the most awful part! You now need to carefully place each bit of solder so that it "might" be touching the upper and lower wire at the same time... HAVE FUN! You can actually lift the solder pieces by touching them with your tweezers or even a tapestry needle, they're that light, thankfully the flux on the wires causes them to stick on quite easily, no balancing act, you'll be glad to hear.

Once they are all in place you can use the flame of your soldering iron to melt all of those little bits of solder...and hope everything goes to plan.


And then you will be left with something like this.. I burnt mine slightly!.. but the show must go on., and a few bits of solder did NOT join the wires either..luckily it does the job regardless....And I'm not doing all of the above again for aesthetic purposes! :D


To make the rim of the basket, get a length of the straightened wire, and bend it around the block. You will need to twist the ends together, which is a bit tricky.   And I only had one hand at the time to demonstrate this, the other using the camera, so this is a mirror image of one half of a picture. You use your index fingers to push the wires together so they cross over close to the block, this makes it easier to twist them. Hope this weird picture helps!  P.s. You don't want to make the "wrap" too tight, the vertical wires of the basket mesh need to fit between the "wrap" and the block.


Make two small twists by hand..


Then use pliers to twist them a bit tighter and closer to the block. 


Use pliers as shown, and then clamp tightly.


..Now both sides of the wire meet in a straight line, then you can snip the excess of the twist as shown. Don't snip the twist off!


You can now remove the wrap from the block, and clamp the twist in pliers, as shown.


Now you have a lovely straight join. Lovely!


Place the mesh over the block.  It was at this point, I realised a wire was missing from the vertical section of the mesh..whoops!


Using your fingers to firmly hold the base of the basket mesh to the block, use a ruler or something similar to carefully bend the wires over each side of the block. It helps to  roll the ruler over the wires, so place the ruler slightly back as the red arrow indicates, then roll it towards you. Don't worry about them not being straight as you bend them, you can tidy them up later.


Just wanted to stick this extra photo in, in case the above one didn't make much sense... I'm not Martha Stewart by the way! :D


Now with the wire mesh formed over the block, you can carefully shimmy the wrap down, until you have it where you want it.


Due to that missing wire from earlier, I've decided to fan the wires out slightly on this side, but they should have been vertical. I quite like it though! Anyway...Use your paintbrush to put flux on the wires as shown.


In order to get a good join, all of the vertical wires, need to be touching the horizontal wire. You can use a bit of folded tin foil or tea light foil, until that is achieved. Then place a sliver of solder as shown, and blast with the soldering flame. Work one side at a time.


Er..having technical problems.. Don't forget to flux and solder the twist! It is important that all vertical wires have soldered properly to the horizontal wire, unless you don't mind having a "vintage" basket.


When you remove the basket from the block, snip off the excess wire, including the twist, and carefully file the edges.  Make sure to clean the basket with soap and a toothbrush or wirewool, to remove the flux residue. I would imagine you could paint these, Tamiya spray paint would probably work very well.

Click here for a great tutorial by a Japanese miniaturist, for making an umbrella frame, which should be very useful for people with more advanced miniature wirework ideas.

Saturday, 6 December 2014

1:12 scale Christmas boxes - Super bumper edition printable! :D

Happy Christmas! I'm a tiny bit late with this one. I haven't even got my 1:1 decorations out of the attic yet, but the miniature ones appear to have been brought down. Priorities! :D

Quite a few of the images used for this printable are from Joannes flickr site Take a break. Joanne very kindly uploads a lot of ephemera for other crafters to use free of charge. She used to make dollshouses too! Small world eh? Other images were very poor quality sourced from eBay and fixed up for printing, which I'll probably explain more about in the future, for example the doubl-glo box was very low resolution, and both tinsel boxes are made from copying and pasting bits and pieces together ala Dr Frankenstein :D

The Santa (who needs his face repainted) is an old resin Christmas decoration, the Christmas lights were made using Miyuki beads and green thread for the wire. The plug is a piece of dowel, coloured with felt tip and with wire as pins. I used a plastic clothing label tie to create little bulb tips in each Miyuki bead (very hard to see). The miniature tree is a handmade bottle brush trimmed into a tree shape, with some railway modellers flock applied and no hole beads, and it's unfinished! :D Sort of threw everything together for this scene!  One of the bulbs has fallen off :(

For the printable, I recommend using a sharp craft knife for cutting out the boxes! I used one of those Swan Morton ones.

For best results print at Fine quality, on to 220GSM card.

Link for PDF below.


After printing lightly spray with fixative (or hairspray) to seal the ink.

If you need any tips on cutting out the boxes, etc, for a neat fit, the start of this post has a few. I find tabs annoying to cut out and unpredictable at this size (making the box lid too tight for the base etc.), so I make tabs later on, using paper. See the bottom half of this post for a picture explanation, under the title Shoeboxes and boxes.

I recently bought a bone creaser/folder, highly recommended if you do a lot of this sort of thing! It has saved my nails, which were actually wearing away from all of the creasing....

Cut out all of the windows before cutting out the individual boxes. For the fiddly windows,ie, curvy, spiky areas, use short cuts to help preserve the details, rather than trying to follow the line in one go.


Unlike the other boxes, DO NOT cut out the window on the two tinsel boxes, until the sides have been creased. The tinsel is a fly tying material called Chenille Sparkle, which I bought from Troutcatchers. If your husband/son etc, fishes, I wholly support you nicking from his stash of fly tying equipment :D There are some card pieces in the printable that you can use to wrap the tinsel around.

On the printable G, W, R stands for Green, White, Red, just pencil those onto the boxes, so you know which base belongs to which lid, as the sizes are slightly different. The dividers are also on the template, and are for these 3 boxes. 6mm beads and smaller will fit the boxes.

Unfortunately I couldn't mark out the cuts for printing, so you will need to measure and mark those out. Each slot should be 7mm apart. Make the first cut for a slot, then place the knife directly beside it and make another cut, then use the tip of the knife to remove the "slot" waste. Then the pieces will all slot together nicely.

Some of the other boxes in the printable. You can use cellophane of some sort, to create plastic windows too,  I haven't done that yet....

If you cut out the middle row of trees on the Holiday snow box, you can then put a bit of cotton wool or wadding in the box, and it will show through.

I've included some Christmas Cards in the printable, not shown here. The card might be a bit too thick, but if you run your finger nail or bone creaser along the edges of the card, it should give the illusion of  thinner card.

There are also interior cards for the two Christmas Light/ Lamp boxes, which are a bit awkward to fit, but you can play about with them, as you see fit. I ended up chopping some off.

The plain white card bases (in the printable) need to be creased and folded so that the black lines will be on the inside.

Any idea how to make miniature icicle ornaments? :D


And I think that's it! They would make nice little Christmas ornaments too, with a bit of thread on them and everything glued into place. I would love to see them in a Christmas setting, stall or attic, anything really, so if you make them up, leave a link below :)

 Also, I recently received a package of exquisite miniatures from Pepper, which I can't wait to post about, then that'll be me for this year! :D But even though it's a bit early, I think it is anyway, I wish you all a Happy Christmas, in case I miss you next time due to it being that time of the year ie. Hectic! :D